
FLUICS CONNECT – Getting started

1. Free download and registration
What you need
Access to your email account.
5-10 minutes of your time.
A label printer is NOT required to get started. 😉
Register a new Workspace
- Open the app and register with your email address.
- Authenticate yourself with the code in the confirmation email.
- Choose a unique name for your Workspace. Something your colleague can easily refer to e.g. “FLUICS lab”. The name can later be changed.
- [Optional] Invite your colleagues to the new Workspace.
2. Add your locations and items
Add locations
Workspace locations are the digital twins of real locations in your lab.
- Add as many sublocations as you need.
- Take a picture of the location.
💡Capturing a photo of the location will help your colleagues to quickly find the right freezer, box,…
💡You can also add “virtual locations” that correspond to processing steps your items might go through (Sample preparation; Incubation; Analysis;…). It can be also helpful to have a location called “Templates” where examples of different item categories are stored.
Read our post for more information.
💡An example of a hierarchical location tree including four sublocations:
BioLab –> -80 Freezer –> Drawer #1 –> Box #5
Any location with its respective sublocations and stored items can be freely moved to another location at any time. In the example above one can add a “Building A” and move the “BioLab” with all sublocations into it:
💡For PRO Workspaces: You can print a label for each location with a QR code to quickly access the items stored in it.
Watch the for more information.
Add items
Items can be samples, reagents, instruments, devices or whatever you want to keep track of in your lab.
Every item needs a short name which will be eventually printed on the label.
Location, owner and storage date are automatically assigned.
Take a picture of your item or upload a file (PDF, CSV, TXT,…).
“Properties” are used to further describe an item. Choose between different input fields:
Text or external Barcode
Number (with unit)
Date
Drop-down (Single-value list)
Tags (Multi-value list)
💡Capturing a photo of your item will help you and your colleagues to quickly find it when you search for it. Especially useful for bottles of chemicals or lab equipment such as pH-Meter, photometer,…
Add a series of items
Register many similar items, like aliquots, in one step by adding a series. All items in a series inherit the series properties. Once registered, items of a series can be individually edited, e.g. changing storage locations, opening dates, freezing cycles,..
A typical example would be freezing 10 aliquots (tubes) of the same sample (same location and same content, concentration, volume, etc) where every tube gets its own label. Being identical at the beginning, each item will develop its own history over time.
Watch our for more information.
We have also recorded short
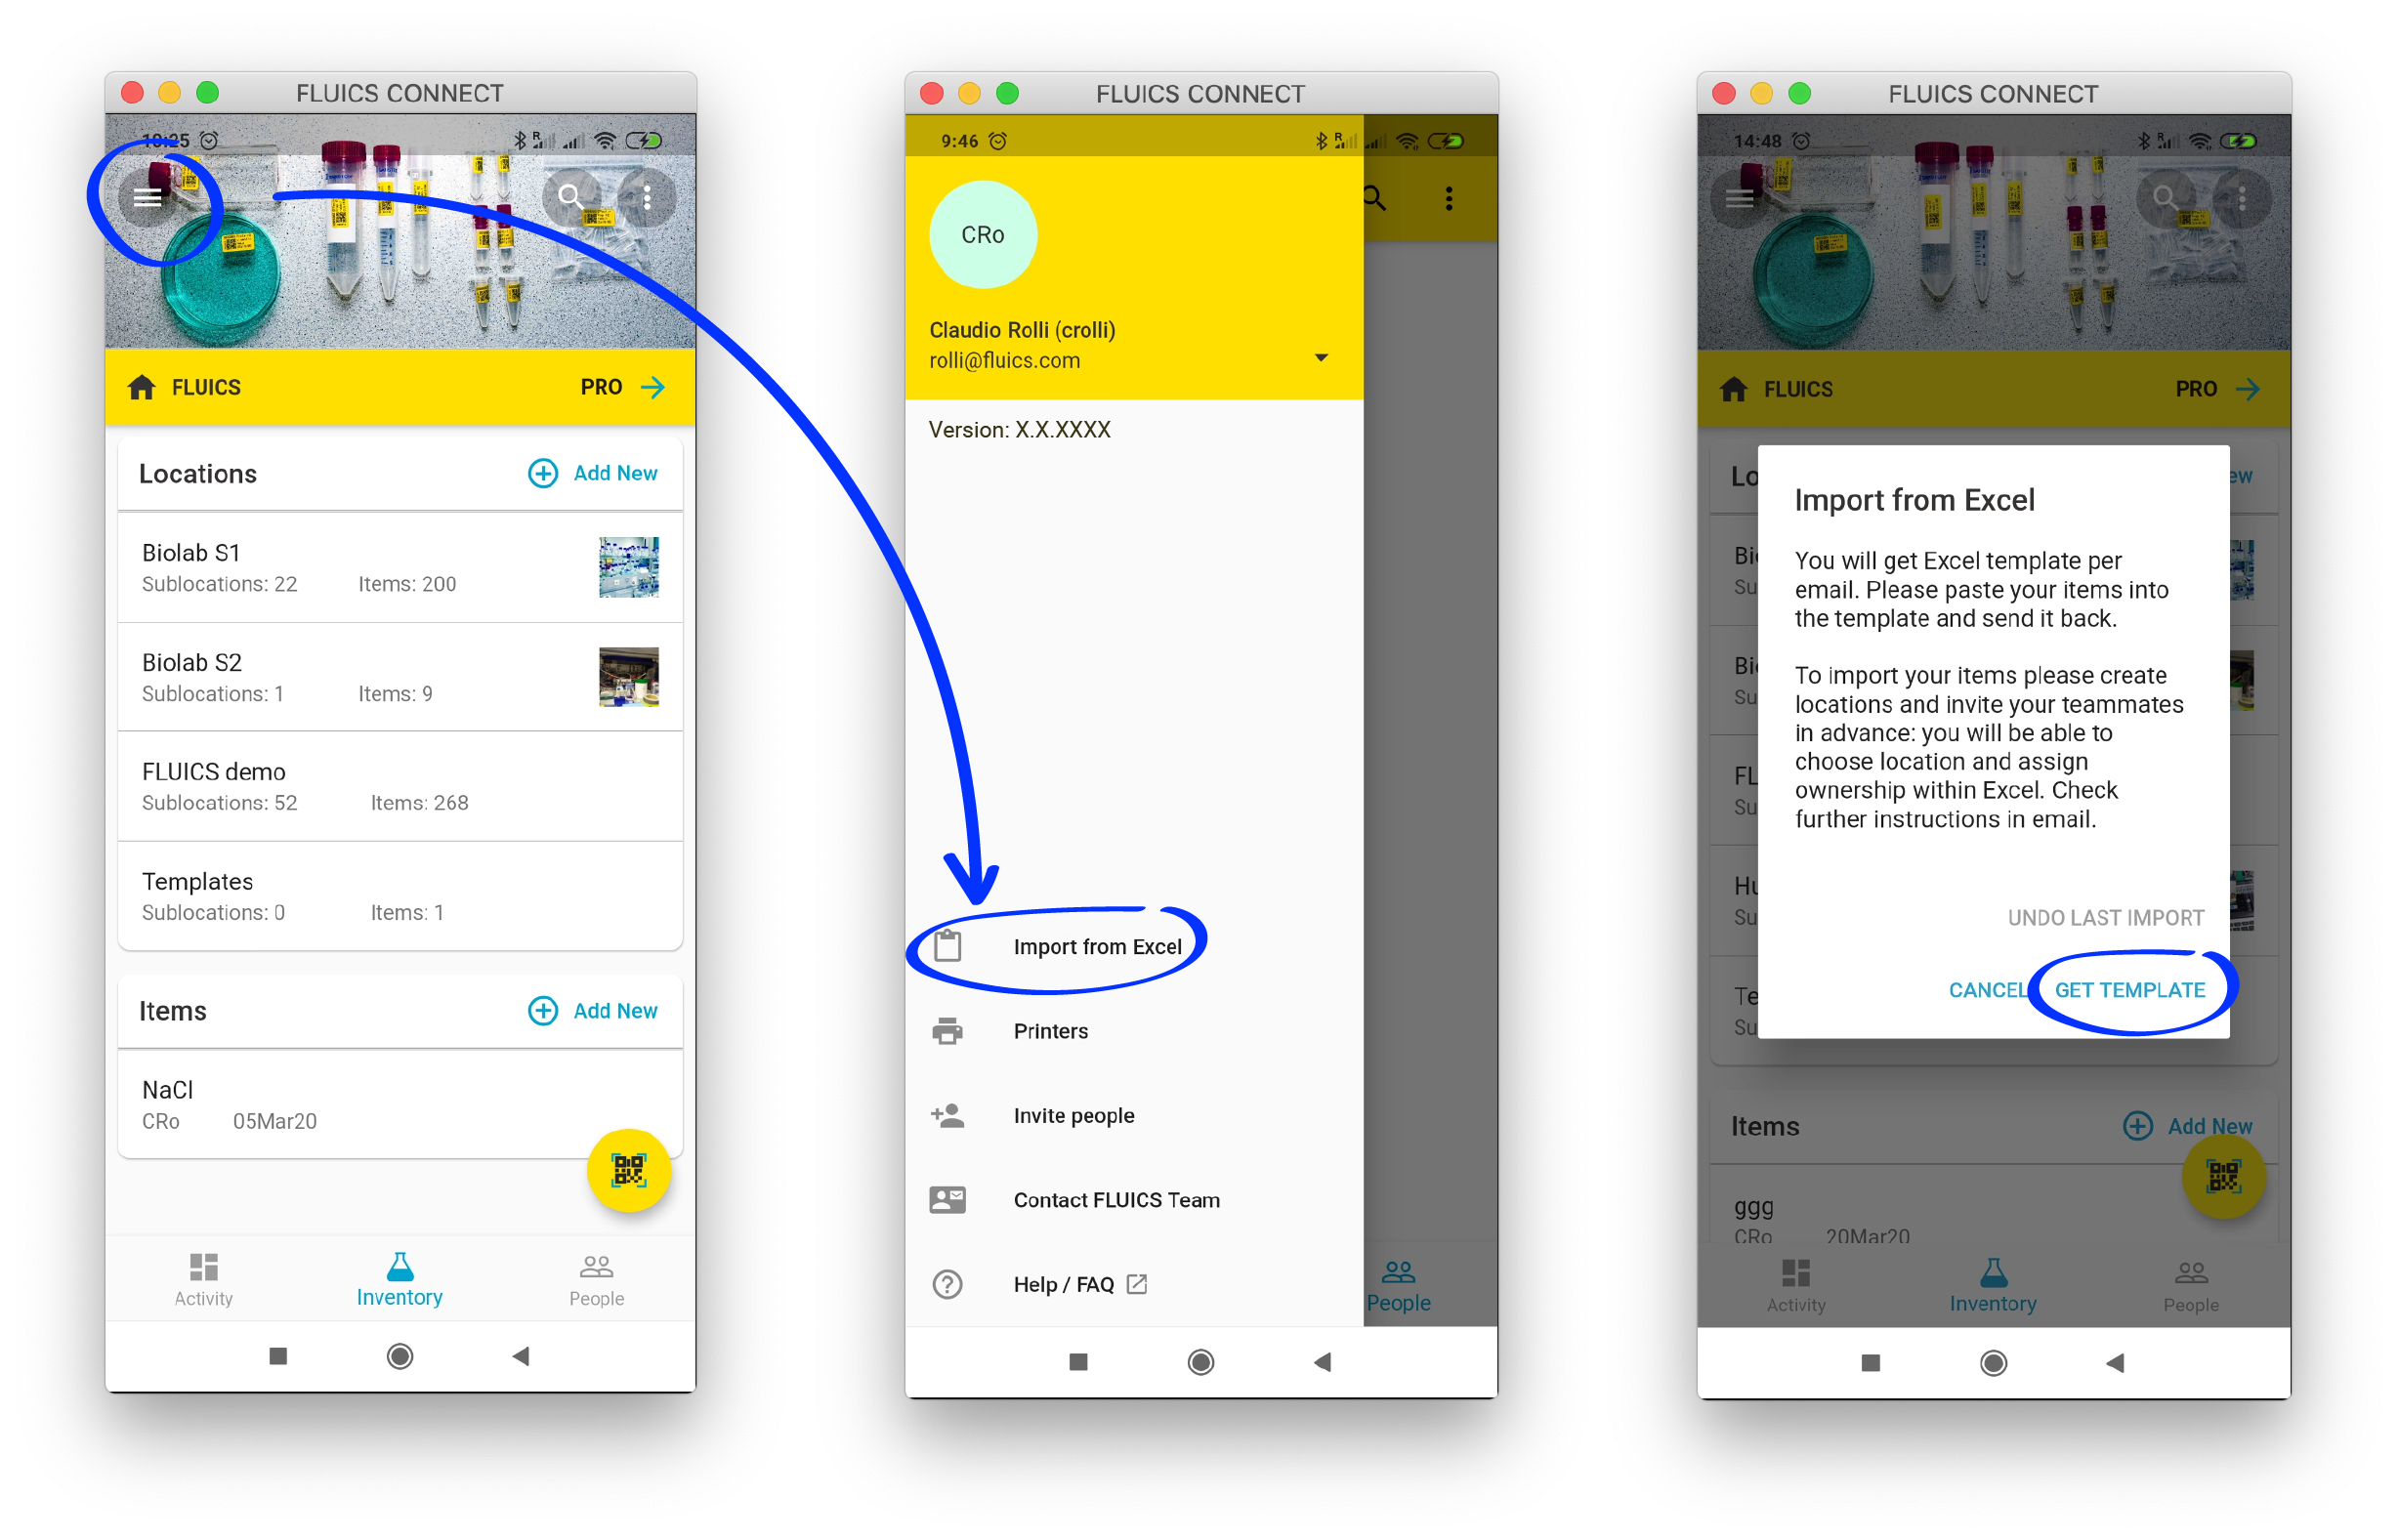
Import items from a spreadsheet
Upload multiple items to your inventory Workspace in one batch.
From the app you can request an Excel template that will be sent to your email address.
Fill out the “Input” worksheet according to the instructions in the email.
Check the “Preview” worksheet to see if you pasted the right information.
Send the spreadsheet back by replying to the email and the items will be automatically added to your Workspace.

Upgrade to print cryo labels with QR codes
Check out the

More questions?
Check out our tutorials and watch our videos with step-by-step explanations. Be suprised how easy it is to use the FLUICS CONNECT mobile and web app.